Ways of Lacing Shoes
Tuesday Bote - April 7, 2021

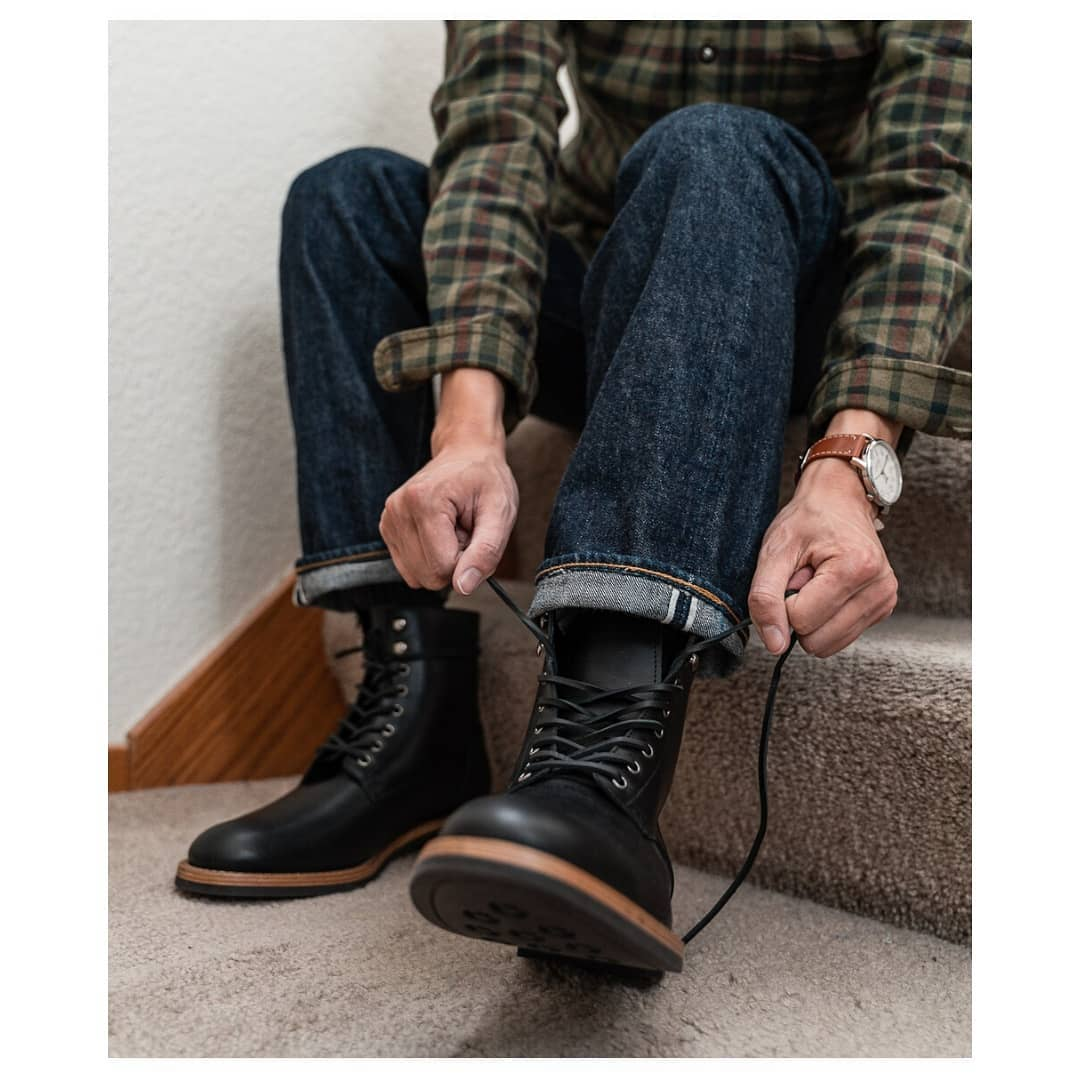
Lace up with Oliver Cabell SB 1 Black Boots
We’ve heard the line often enough from our childhood: tie your laces properly! We can’t blame our mothers for the admonition. Properly laced and tied shoes stayed on our feet longer even after hours of active play, rough-housing, as well as long walks or hikes.
But now that we’re all grown up, how many still care about properly lacing their kicks? We see style icons who wear their sneakers unlaced or laced but untied. Others, who never really got the hang of lacing shoes, boots, and brogues, opt for the laceless footwear variety.
Still, lacing your shoes properly is a great way to ensure that your overall look is well put together and not sloppy. Also, medical experts agree that keeping shoes properly laced prevents serious foot health issues in the long run.
Tying Your Laces Based on Your Foot Type

Regardless of what sort of shoes you get for yourself, you need to ensure that these are laced well in order to provide a proper fit and to prevent injuries
Some shoes are already sold pre-laced: all you have to do is adjust the tongue and laces to ensure that the shoe fits you correctly. But podiatrists and orthopedic specialists say that lacing will depend on the shape and type of your feet.
As we said earlier, shoe laces make for a more comfortable fit and prevent issues like blistering and bunions from happening.
So, how do you lace up for your foot type?
Normal Feet: As Basic As It Gets
If your feet are relatively standard – average-sized, no skin or joint issues, and no bones jutting out awkwardly - then regular criss-cross lacing is the technique for you. Criss-cross lacing ensures that your feet are encased snugly in your shoes, provided that the laces are pulled securely.

White Cotton Laces
When pulling your laces, start with the eyelets closest to the toe of your shoe. Then, work your way up to the ankle.
Note, however, that if you use this method but leave your laces tied just enough for you to put them on comfortably, you cannot expect your shoes to give your feet ample protection and support - also, it just looks sloppy and irresponsible.
Gap Lacing for High Arches
People with high arches end up with blisters on the tops of their feet given the constant friction between the skin and the underside of the shoe's tongue. Gap-lacing is a good solution for preventing this, as it's a technique that reduces the pressure at the top of your foot without compromising the fit and comfort overall. Since it only laces the lowest and highest eyelets on the shoe, the gap in between ensures superb comfort as well as a snug fit. The steps are as follows:

- Lace the shoe in a criss-cross style through the lowest set of eyelets (the ones closest to the toes);
- Thread the laces through the sides only; then
- Tie up the shoe through the next set of eyelets or, if you need a larger gap for comfort, at the highest set.
A variation for the high-arch technique applies to those with a high mid-foot. In this case, gap-lacing takes the pressure away from the sides of the foot and prevents chafing.
Criss-crossing the laces is done in reverse here: you criss-cross with the two lower sets of eyelets, then thread through the sides, and finally lace up at the uppermost set.
Lacing for Wide Feet and Flat Feet
Having wide feet can be a challenge, but lacing up for them may depend on which part of your foot is widest. In which case, we present two different lacing methods:
For those with a wide forefoot, essentially the part where your toes are:
- To start, thread your laces through the sides;
- When you reach the mid-foot, start criss-cross lacing up to the top eyelets;
- Tie your laces.
This method ensures that you get ample space for the width of your forefoot within the shoe’s toebox.

For those with flat feet or feet that are just wide all over:
- Start lacing from the lowest eyelets using the criss-cross technique;
- Instead of lacing all the way up, however, you only lace through every other eyelet;
- Continue until you reach the top eyelets, then tie up your shoe.
Lock-lacing for Narrow Heels
If you can feel your heels slipping inside your shoe, lock-lacing will help you feel more secure and comfortable:
- Criss-cross lace-up until the second-to-the-last eyelets;
- Thread through the sides up to the final holes without crisscrossing;
- Thread the lace through the tongue loop to the other side; then
- Tie your laces as normal.
Not only will this technique keep your heels from slipping, but it will also give ample support for your ankles, protecting them from sprains and twists.
Lacing for Style
While lacing for comfort and safety is all well and good, there are ways of lacing up your shoes to make sure that they aren’t just comfortable, but you also look good in them.
Brighten Up Your Kicks with Lightning Lacing
With a look reminiscent of a bolt of lightning (or, if you want to get magical about it, Harry Potter's scar), the lightning lacing technique also gets its name from how quickly you can pull it off - lightning fast. It's a great way to inject a dynamic touch of fun into an outfit, particularly if you're out clubbing.

Slate Cotton Laces
- Insert the shoelace into the lowest sets of eyelets with their aglets (the plastic-coated tips of the lace) pointing towards you. Pull tightly, making sure that the ends are even;
- Take the left lace and pull diagonally across the outside of the upper into the top eyelet on the right - and leave it for now;
- Take the right side of the lace and cross it over the upper into the second eyelet from the bottom on the left;
- Pull the right lace straight up and into the next eyelet above it on the same side;
- Insert the aglet of the right lace into the eyelet second from the bottom on the right;
- Repeat steps 3 to five, making sure to alternate which side the lace is on until you reach the top eyelet; then
- Tie the ends of the laces together.
Make a Bold Statement with Lattice Lacing
All right: let's say that there is nothing basic about you. You love bold colors in your outfits, and you make it a point to grab everyone's attention with whatever you're wearing. In which case, staid and straight-up lacing won't work for you. Instead, consider this somewhat more elaborate method that literally involves weaving your laces into a striking pattern that definitely works with equally sharp-looking kicks like a pair of Oliver Cabell Low 1s in vivid crimson or the Oliver Low 1 YOLO with its silvery shimmer.
- Insert the shoelace into the bottom two eyelets with the aglets pointing toward you; as with lightning lacing, pull them tightly, ensuring that the ends are even;
- Cross the left and right ends of your laces, then insert into the third set of eyelets from the bottom;
- Run both laces up through the inside, then pull them out of the eyelets directly above the point of insertion;
- Cross the laces on the outside again, but this time pull them through the eyelets three rungs below;
- Run the laces up the inside to the next eyelet. However, as you run them across the outside, weave each one through the crosses you made. Pull the ends of the laces out through the top eyelet;
- Repeat for both the left and right laces.
Things to Remember About Lacing Shoes

Red Cotton Laces
Now that you know how to lace your shoes, it’s best to take the professionals’ advice so that you enjoy the maximum benefits of properly done footwear. For the most part, doctors insist on the following:
- Be sure to loosen the laces before putting on your shoes. Not only is pushing your feet into pre-tied shoes a slovenly habit, but it also wears out the eyelets and the backs of your shoes, drastically reducing their durability and longevity.
- For the best fit, start lacing up through the lowest eyelets - again, those closest to the toes - and tighten your laces one set of eyelets at a time;
- Choose shoes with more eyelets so that you can easily adjust your laces to make your shoes fit better;
- Be sure to adjust your laces throughout the day and not just when they come undone. Remember: feet expand because of heat and pressure, so let them cool down by loosening your laces throughout the day; and
- Ensure that your laces lie flat when lacing, as twisted laces will cause friction on the top of your foot.
Need Lace-up Shoes? Consider Oliver Cabell
Made by expert cobblers backed by the finest Italian shoemaking traditions, each pair of Oliver Cabell sneakers is elegantly crafted with sustainably-sourced fine leather uppers, lined with supple calfskin, and finished with cotton laces.
Each pair is a stunning addition to the modern wardrobe: elegant, stylish, yet timeless all at once.